Buses ready for routing whenever I need it.
Bus 1 – Automatic Double Tracking and Doubling Bus
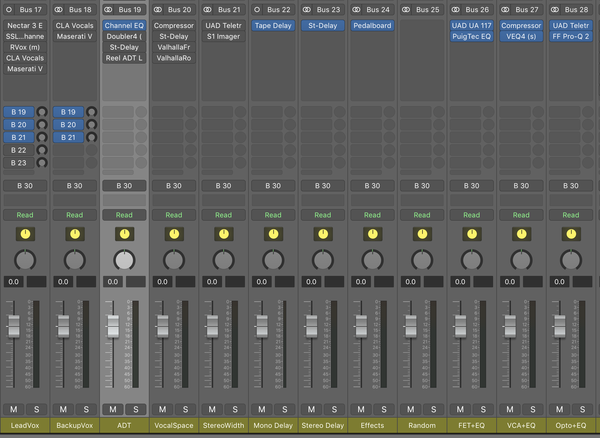
I usually have a few different things on my ADT bus:
- Stereo
Delay
- Waves Doubler
- Waves ADT Reel to Reel plug-in
All of these plug-ins do a variation of the same thing: make vocals sound like they were doubled.
If you don’t have the time or budget to record a real double of the vocal, you can use this effects bus to create a pseudo double to thicken up your vocal track. Because the
delays on the parallel track are so short, it’ll give you a larger vocal without any real “space” to it.
Here’s one way to do it:
- Send the vocals to a stereo delay with 21 ms on the left and 29 ms on the right.
- Use a pitch-shifter to detune or pitch up the vocal about 10 cents.
- Add the send under the main
vocal track until you’ve achieved the desired ambience needed.
- An advanced way to do it is with two mono delays panned hard left and hard right with one pitch shifter detuning the vocal down 10 cents while the other pitches the vocal up 10 cents.
You can also try to use a simple chorus plug-in instead of a delay to double the vocals. If you add a bit of the chorused signal underneath the lead vocal you’ll
get a thicker sound, emulating a double-tracked vocal part. It’s a simple enough trick, and great for giving a little more breadth to your lead vocal.
Similarly, you can do the same thing with backing vocals. You can get a really nice wash of backing vocals if you have several panned vocals parts routed to a stereo chorus. Try it next time you want a dry vocal part that you don’t want to push way back into the mix.
Bus 2 – Vocal Space
I tend to process my vocals a little bit differently than the rest of the instruments. That’s why I have a separate vocal space bus in addition to the instrument reverb. The reverb is used to give a sense of glued space to all the instruments, but the vocal space bus is dedicated to finding the perfect vocal sound.
Depending on the type of sound you’re looking for,
you’re going to approach this vocal space bus differently. Is the singer singing long sustained notes, scat singing, or rapping? These are some of the factors you might want to consider when choosing your vocal reverb.
The rhythm of the vocal can tell you if the reverb you’ve chosen actually works. If you’re going for “My Heart Will Go On” Celine Dion-long sustained singing then a large and long reverb might work exceptionally well. But if your singer is
Scatman John then a long reverb will probably just get in the way.
However, regardless of genre and style, my Vocal Space bus always comes pre-loaded in my template with a few things:
- Compressor (in case I’d like to compress the reverbs or add some parallel power)
- Stereo delay for longer delays than the automatic double tracking bus
- A reverb. I usually have the Valhalla Room on there, but the EMT 140 Plate also comes in handy on occasion
This usually gives me enough variation to create the sense of depth and space I’d like on the vocal. Combining the delay and reverb together in various ways can often yield some interesting results so I’m constantly trying out one in front of the other to see whether the song in question likes diffused delays (with the
reverb after the delay), or an echo reverb (with the delays after the reverb).
For an in-your-face lead vocal, scrap the reverb entirely and use a delay to make the soundstage wider. Delay adds space without making the vocal sound distant, something that happens all too often when you use too much reverb. Depending on the BPM of the song, style, and genre, use either short, medium, or long delays.
If it’s a
ballad with long, drawn out words then a long delay creates a big sound without overpowering the actual vocal. A fast rock song benefits from a short, subtle delay and groovy pop songs use medium delays to great effect.
Also, if you have a “verse vocal” and a “chorus vocal” you can easily use send effects to distinguish them better. For instance, if you don’t want a big reverb in the verses but you think it would be nice to have a larger space in the
chorus. Just send the verse vocal to the delay and you send the chorus vocal to the vocal reverb. This will add contrast to the arrangement as well.
Bus 3 – Vocal Widening
This is one of my all-time favorite tricks for creating bigger and wider vocals. It’s incredibly simple but sounds soooooo good. It’s something I do with all my mixes to create a sense of space, depth, and width without cluttering it up with
time-based effects like reverb and delay. I love using it on vocals, but you can also use it on different instruments if you’d like.
Here’s what I do:
On an aux bus, I’ll add a compressor and then a stereo widening plug-in. I use the S1 Stereo Imager, but you can use whatever stereo widening plug-in you have lying around.
Then, I’ll simply send the vocals to that bus for
instant wide vocals. I usually go all out and send as much as I can (up to unity gain on the send). Usually it just makes the vocals stand out so much more.
Try that trick in your next mix and I guarantee it’ll be a game changer for you.
-
If you'd like to watch the accompanying video that's included with this part of the eBook, as well as learn the rest of my
production workflow when it comes to producing vocals, join Expert Home Vocals right here before it closes to new members tonight!