Become a member of Mixing With 5 Plug-ins at www.mixingwith5plugins.com
The course closes to new members and the price goes up TONIGHT.
What's Included in Mixing With 5 Plug-ins?
As soon as you sign up you get the multi-tracks to the song we'll be working on together.
Then every week you'll get a new video tackling that week's plug-in, showing you exactly how I go through mixing the song as well as giving you additional tips and tricks that you can use in your mixes.
Then you can post
your progress inside the Facebook community or inside the member website and get feedback from other members and listen to how others are doing, giving you ideas on what you can improve.
Plus: Brand New Content For Free Before The Price Increase Tonight!
- New
Multi-tracks
- Brand New 5 Plug-ins Quick Start Video
- Final Mix Feedback For Every Member
This course will close tonight at midnight so click the link below to join us and let's make a killer
sounding mix using only 5 plug-ins!
www.mixingwith5plugins.com
--
All the tutorial videos in Mixing With 5 Plug-ins are scripted and edited so you don't get bored while watching. I want to respect your time and give you as much content as possible in the most efficient manner so in case you don't want to watch the video above feel free to browse through the script instead.
SCRIPT: Mixing With 5 Plug-ins
Wrapup
Ok, so I wanted to finish up the Mixing With 5 Plug-ins course with a little wrap up here.
So to recap here’s what we’ve done:
In the first video we’ve done some basic balancing. I also recommended color-coding the tracks in the mixer as well as
grouping instruments together in groups in order to simplify your mixing.
It’s crucial to do critical listening to everything that’s going on in the song and possibly jot down some notes, or make mental notes, of what sticks out that you either want to accent or need to work on when you’re first listening to the tracks. For instance, even after getting a good balance we still needed to work with the vocals to get a
good balance, which we accomplished more or less with compression (in my case serial compression), but I’ll also do some light automation on them too.
Then during EQ we started by cleaning up and filtering. Filtering is crucial and you should both use high and low-pass filters to clean up on both sides of the spectrum. Then we did subtractive EQ and boosts to take out unflattering frequencies and accenting
instruments with boosts.
After that we did some compression, either to add punch to drums or for leveling vocals and guitars for instance.
In the reverb and delay video I gave you a few different ways to add space to your mixes, and I hope you took some of that advice as well as found your own way. Because reverb and compression,
to me, are some of the more subjective aspects of mixing. You can use compression 5 different ways that all sound different but still GOOD, and the same goes for reverb.
Saturation is something I love using to bring out some character in the instruments but it doesn’t always work and you sometimes have to use a few different plug-ins or tweak the settings in order to really get the results you
want.
Now, to finish off the mix I need to do something that you should always do in order to get your mix to translate well across multiple systems, which is listening to your mix on multiple speaker systems and take down notes on what jumps out on you that you need to fix.
In my case I’ll be listening to this mix on my HS5M monitors,
my KRK Rokit 8 First generation monitors (my old and reliable monitors I got when I first moved to the US), and then my Behritone MixCube that’s really crucial for hearing how your mix sounds on shitty consumer speakers. I’ve found that because it accents the midrange so much it’s great for cleaning up and separating instruments in that area.
I also use my Sennheiser HD515 headphones to check my mixes and I’ve used
them more or less throughout these lessons as I’ve been doing these tutorials alongside mixing this track.
If you only have access to one set of monitors then I recommend bouncing your mix out and listening to it on your laptop speakers, your smartphone, your earbuds, your car stereo or your living room HIFI system if you have phone. Getting multiple speaker perspectives on your mix is crucial for
translation.
So I’m going to take a listen to the mix on my systems and see if I need to do any tweaking.
All right I listened to the mix three times on these three monitors and here are the notes I wrote down.
Yamaha’s
- A little mid-rangy on the guitars. -added cuts in 300, added boost in 2.5 -V-EQ
- Snare and kick a little too forward
- Cut the low MIDS in the backup vocal
- possibly too much muddiness on the keyboard?
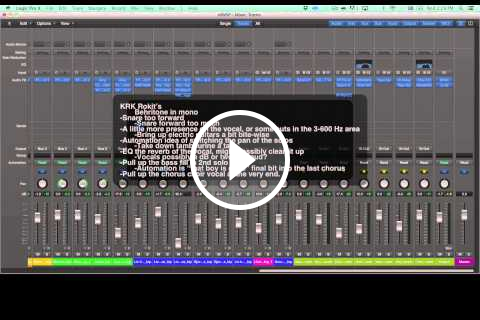
KRK Rokit’s
- Snare too forward
- A little more presence on the vocal, or some cuts in the 3-600 Hz
area
- Automation idea of switching the pan of the solos
- EQ the reverb of the vocal, might possibly clean it up
- pull up the bass fill in 2nd solo part
- Pull up the chorus
choir vocal at the very end.
- Overall a little honky?
Behritone in mono
- Snare forward too much
- Bring up electric guitars a bit
bite-wise
- Take down tambourine a tad
- Vocals possibly a dB or two too loud?
- Automation is “that boy is gone” final bit into the last chorus
Ok, here is what I
did.
On the electric guitars I cut some more from the mids. The waveform looks a bit weird but they sounded pretty closed and “blanket-y” if that’s a term. I also added some 2 kHz boost to bring out the edginess of them. You can do this by fixing the EQ at the start but that does mean that it changes the gain structure of the rest of the chain so I often like to put a character EQ like the Waves V-EQ at the end to
do some frequency rebalancing.
I cut the snare about a dB or so which seemed to move it back a bit. I could’ve also tried to find a different reverb to push it back but I actually like the sound of the snare as is, I just thought it was too loud. I also thought I added a bit too much high end on the drum bus so I took that down a little bit.
I rebalanced the backup vocals as well with EQ, took out some of the muddiness and added a shelving in addition to the filter which cleaned it up a bit more.
I did something similar with the keys, where I added a shelving to cut out some of the honkiness from the keyboard in the 300 Hz down but I find that there’s a lot of character in keyboards in the middle frequencies so I boosted a bit
in the 600 Hz area as well.
I did some rebalancing of the backup vocals because I thought my voice was a bit honky.
I also EQ’d out some of the reverb because it was sounding honky as well, which might have been contributing to the overall honkiness of the mix.
Then I did some slight automation on the bass, the guitar solos and the backup vocals.
Overall I think this is a pretty exciting mix and although I could keep tweaking it forever it’s time to let it go and have a listen to all of your final mixes.
I hope you enjoyed this course and the methods I showed you
during these five weeks. I’m looking forward to hearing what you come up with and the feedback you give each other inside the Facebook community.
As you most definitely know by now I’m Björgvin from Audio Issues. Have a great time mixing!